Assembly
Please read the assembly manual carefully before proceeding with the house installation! You will thus avoid problems and will not waste time.
Recommendations
- Keep the house package until its complete assembly in a dry place, but not in direct contact with the ground, protected from weather conditions (moisture, the sun, etc.). Do not keep the house package in a heated room!
- When selecting the garden house location, make sure that the house will not be subjected to extreme weather conditions (areas of strong snowfall or winds); otherwise you should attach the house (for instance, with anchors) to the subsoil.
- All timber elements are natural and need to be treated with wood protection products by the customer to resist weather effects.
For assembling you will need the following tools:
- assembly aid
- water-level
- knife
- ladder
- screwdriver
- measuring tape
- hammer
- saw
- pliers
- drill
- protective gloves
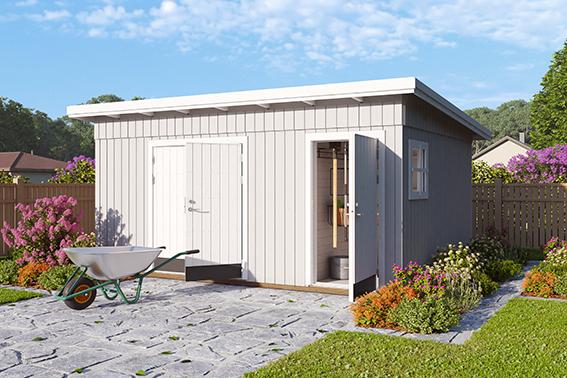
House pack contents
Prefabricated elements of the garden house are packed for transportation. The package includes all the parts needed for the construction of the house: treated foundation joists, planed floor and roof boards, tenoned wall elements, rafters and purlins, doors and windows fitted with glass, trim for roofs and floors, assembly kits including screws, nails, etc.
Package of that kind weighs 661.4 lbs to 4,409 lbs, depending on the size of a house. Since the package contents of products vary, examining the description of every product is recommended in order to know the contents and products that you can buy in addition. For example, instead of ordinary glass, children’s houses are fitted with less fragile acrylglass for safety considerations; some house packs already include roofing felt that can otherwise be bought as an extra, etc.
Preparation of components
Sort the components based on the wall plans (see Technical specifications) and place them at the four sides of the house in the installation sequence.
Attention:
Never place the components directly on grass or a muddy surface because it will be very difficult or even impossible to clean them up later!
Garden house installation
Installing a garden house begins from preparing a perfectly level and square foundation. Pouring a concrete foundation is not essential for that purpose; lightweight construction blocks, concrete slabs or posts are also suitable as a base. They need to be dug partly into the ground and levelled before installing the house in order to prevent the house from sinking.
Every house has installation manual included, describing all the main installation stages and separately displaying the wall elements. You can see some of the installation manual by the product description on Palmako’s home page.
Foundation
Prepare the foundation so that its upper edge extends from the ground to a height of at least 1-15/16" and the foundation joists are propped up on every side with intervals not exceeding 19-11/16" - 23-5/8". At the same time make sure that there are sufficient air apertures under the house floor for ventilation.
The following foundation options are recommended:
- Strip or spot (pile) foundation
- Foundation from concrete or pavement slabs
- Slab foundation (cast concrete bed)
The base frame of the house must be completely flat and level to ensure that the installation proceeds without problems.
Attention:
different houses can have different foundation placements – see the appended base frame drawing from the installation manual supplied with the product.
Take a look at the assembly videos
Our installation videos are made for illustrative purposes only and show general installation principles of a product group.
During installation you must always follow the product specific installation instructions that come with the product!